DIY Wood Signs With Chalk Couture
Making your own wood signs has never been easier with the use of Chalk Couture transfers and chalk paste. Chalk Couture has so many transfers you are sure to create a one-of-a-kind sign that no one else will have. This post contains affiliate links for your convenience. If you click a link and make a purchase, I could earn coffee money.
How to DIY Your Own Wooden Sign with Chalk Couture
Wood sign (Hobby Lobby)
Clorox wipes
Paper towel
How To Make Wood Signs
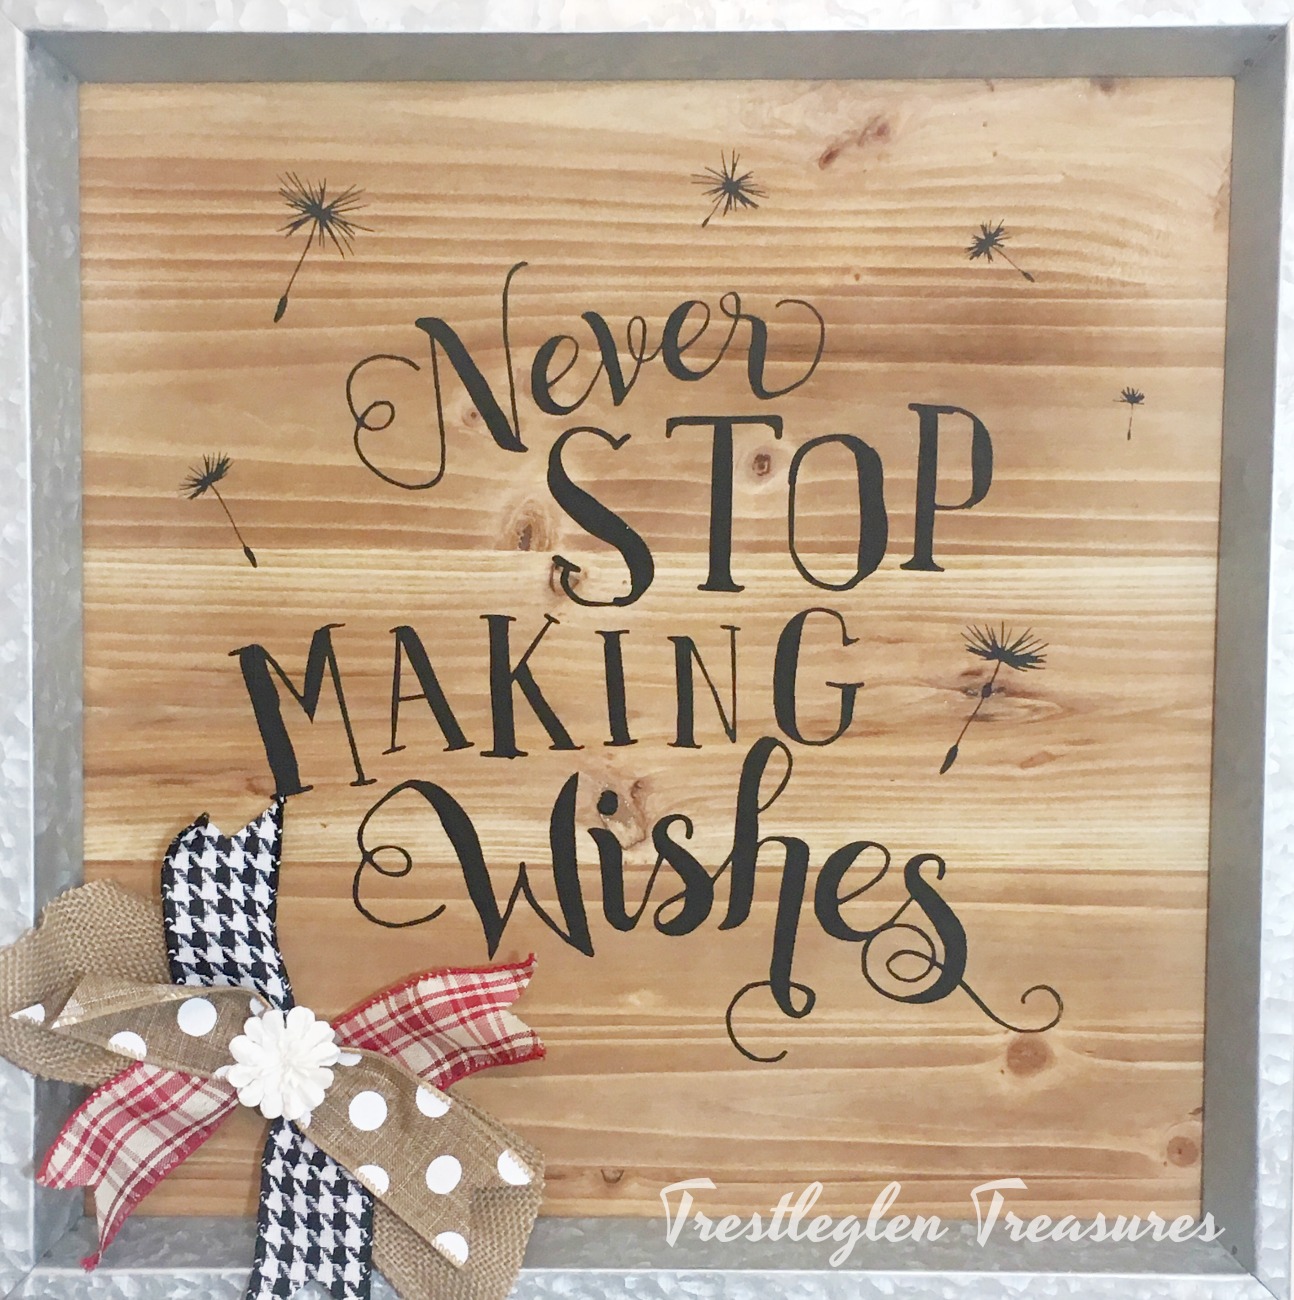
- You will first apply a Min Wax over your wood piece and let it dry for 10-15 minutes and then buff with a dry rag. This helps the chalk paste adhere to the wood.
- Cut your transfer to fit your sign. Be sure to cut it with the backing still on it otherwise, it will be too sticky to cut and you could ruin your transfer.
- Place transfer where you want it and smooth out any air bubbles.
- Quickly apply chalk paste in a thin layer. DO NOT let it dry. And then lift off your transfer. It’s that easy!
- Place the transfer in water or wash it off right away and then wipe it down with a Clorox wipe and let it air dry with the sticky side up.
Let me know if you enjoyed this and don’t forget to join me on Facebook so you can watch me Live!
Love and Light!
Bernita